

How to Edit like a Pro
Courtney Sipila
March 19, 2026
I started editing videos in 2019 during my sophomore year of high school. Despite how time consuming, frustrating and meticulous the process is, I fell in love with creating videos. It’s rewarding to see your hard work posted to Youtube or on TV.
In this blog, we’ll answer the basics about editing, from different softwares, basic editing and things to look out for.
As someone who has used most editing softwares out there (except final cut pro), I’ve learned what I like and don’t like in editing software. I have specific ways I like to structure my workflow which aligns more with programs like Premiere or Davinci or editing software with integration with other softwares for creating graphics like Premiere (can you tell I’m an Adobe girl).
But, to find what editing software you should use, it will take trial and error. Every software has benefits and drawbacks and depending on what you want in a software will choose which you pick.
Pros
Integrated with Adobe suite
Industry standard
Versatile Formats
Cons
Difficult to learn
Cost
Requires high end software (good CPU, GPU, and high RAM)
Pros
Everything is integrated into one platform (audio, video and Fusion VFX)
Free version offers 95% of features
One time fee of $295 for Pro version
Cons
Requires high end software (good CPU, GPU, and high RAM)
Difficult to learn
Pros
Great performance and speed
Magnetic Timeline
One time fee for Pro version
Cons
Apple Exclusive
Difficult to learn
Pros
Easy to use
Free
Good for quick content
Cons
Limited features
Prone to lagging
Privacy Concerns
Pros
Easy to use
Free (for most things)
Easy to collaborate with others
Cons
Limited advanced editing (color grading, effects, etc.)
Projects limited to 10 minutes
Limited export options
No matter what software your using there are a few key video editing terms and knowledge you need to know
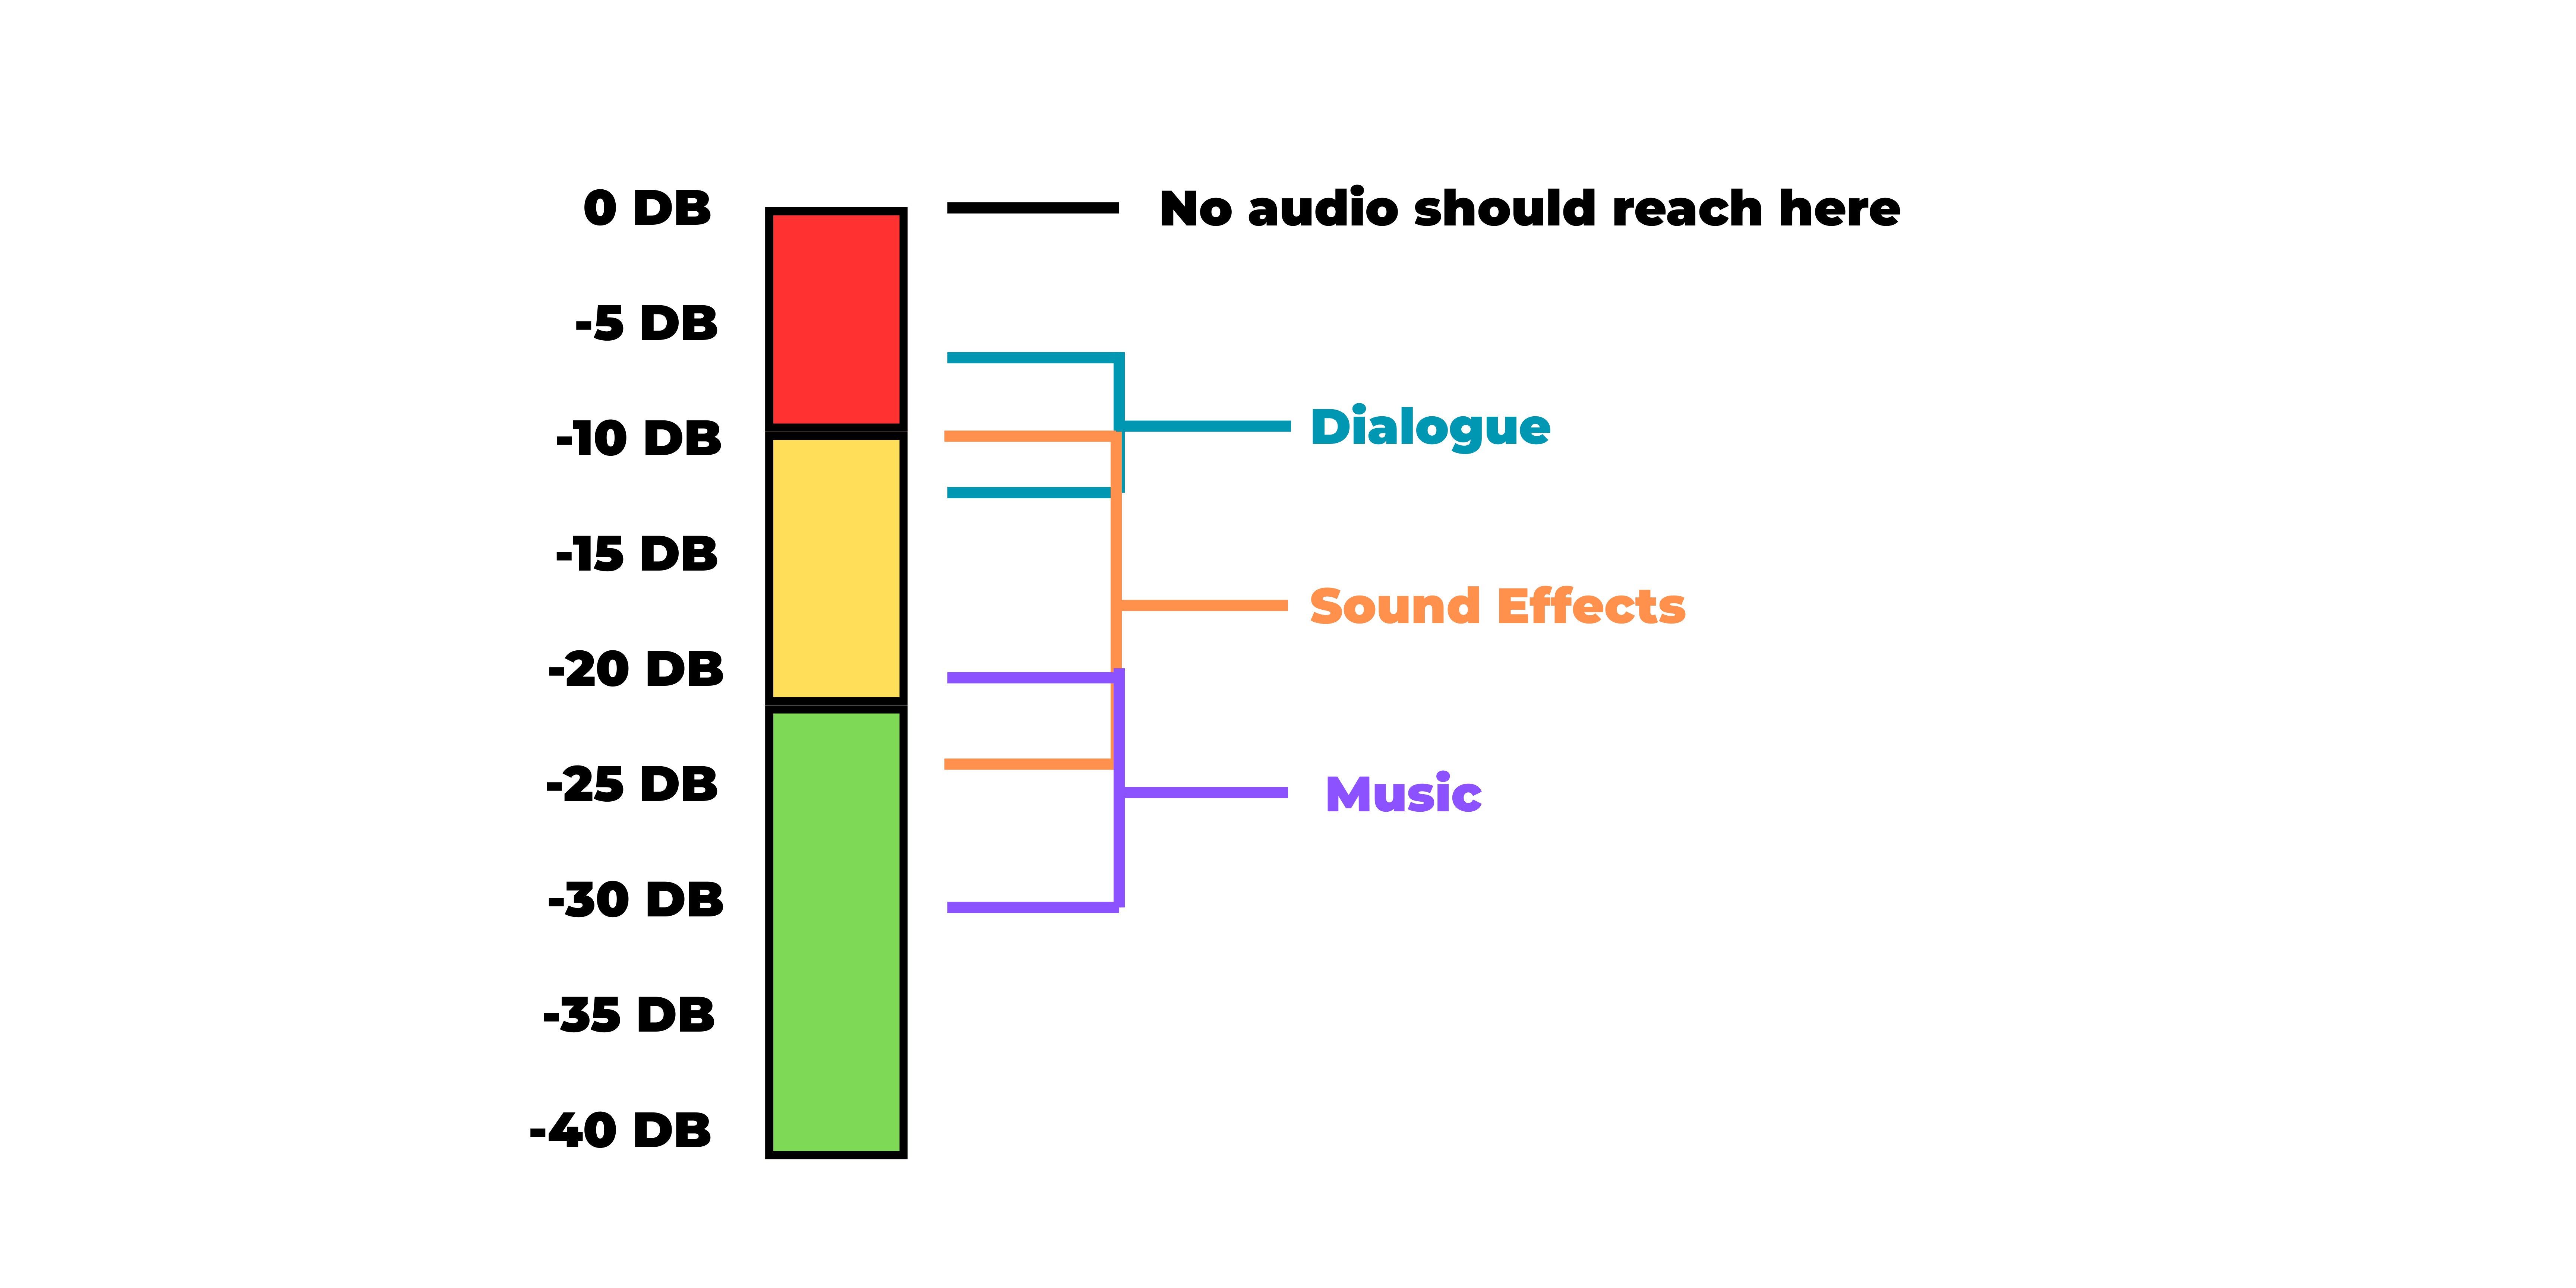
One of the most important aspects of a video is the audio. It might seem straightforward but audio can create many challenges. Depending on what sound your audio is, from speaking to music, it requires a specific range of acceptable decibels. This diagram shows the levels for speaking, sound effects and music. Dialogue: -6 to -12; Sound Effects: -10 to -25; Music: -20 to -30.
One feature many video softwares have is in and out points. These can be used to clip certain parts of the video before adding it to the timeline.
B-Roll: Supplementary footage added to enhance the story
Timeline: The workspace where the edited video and audio is
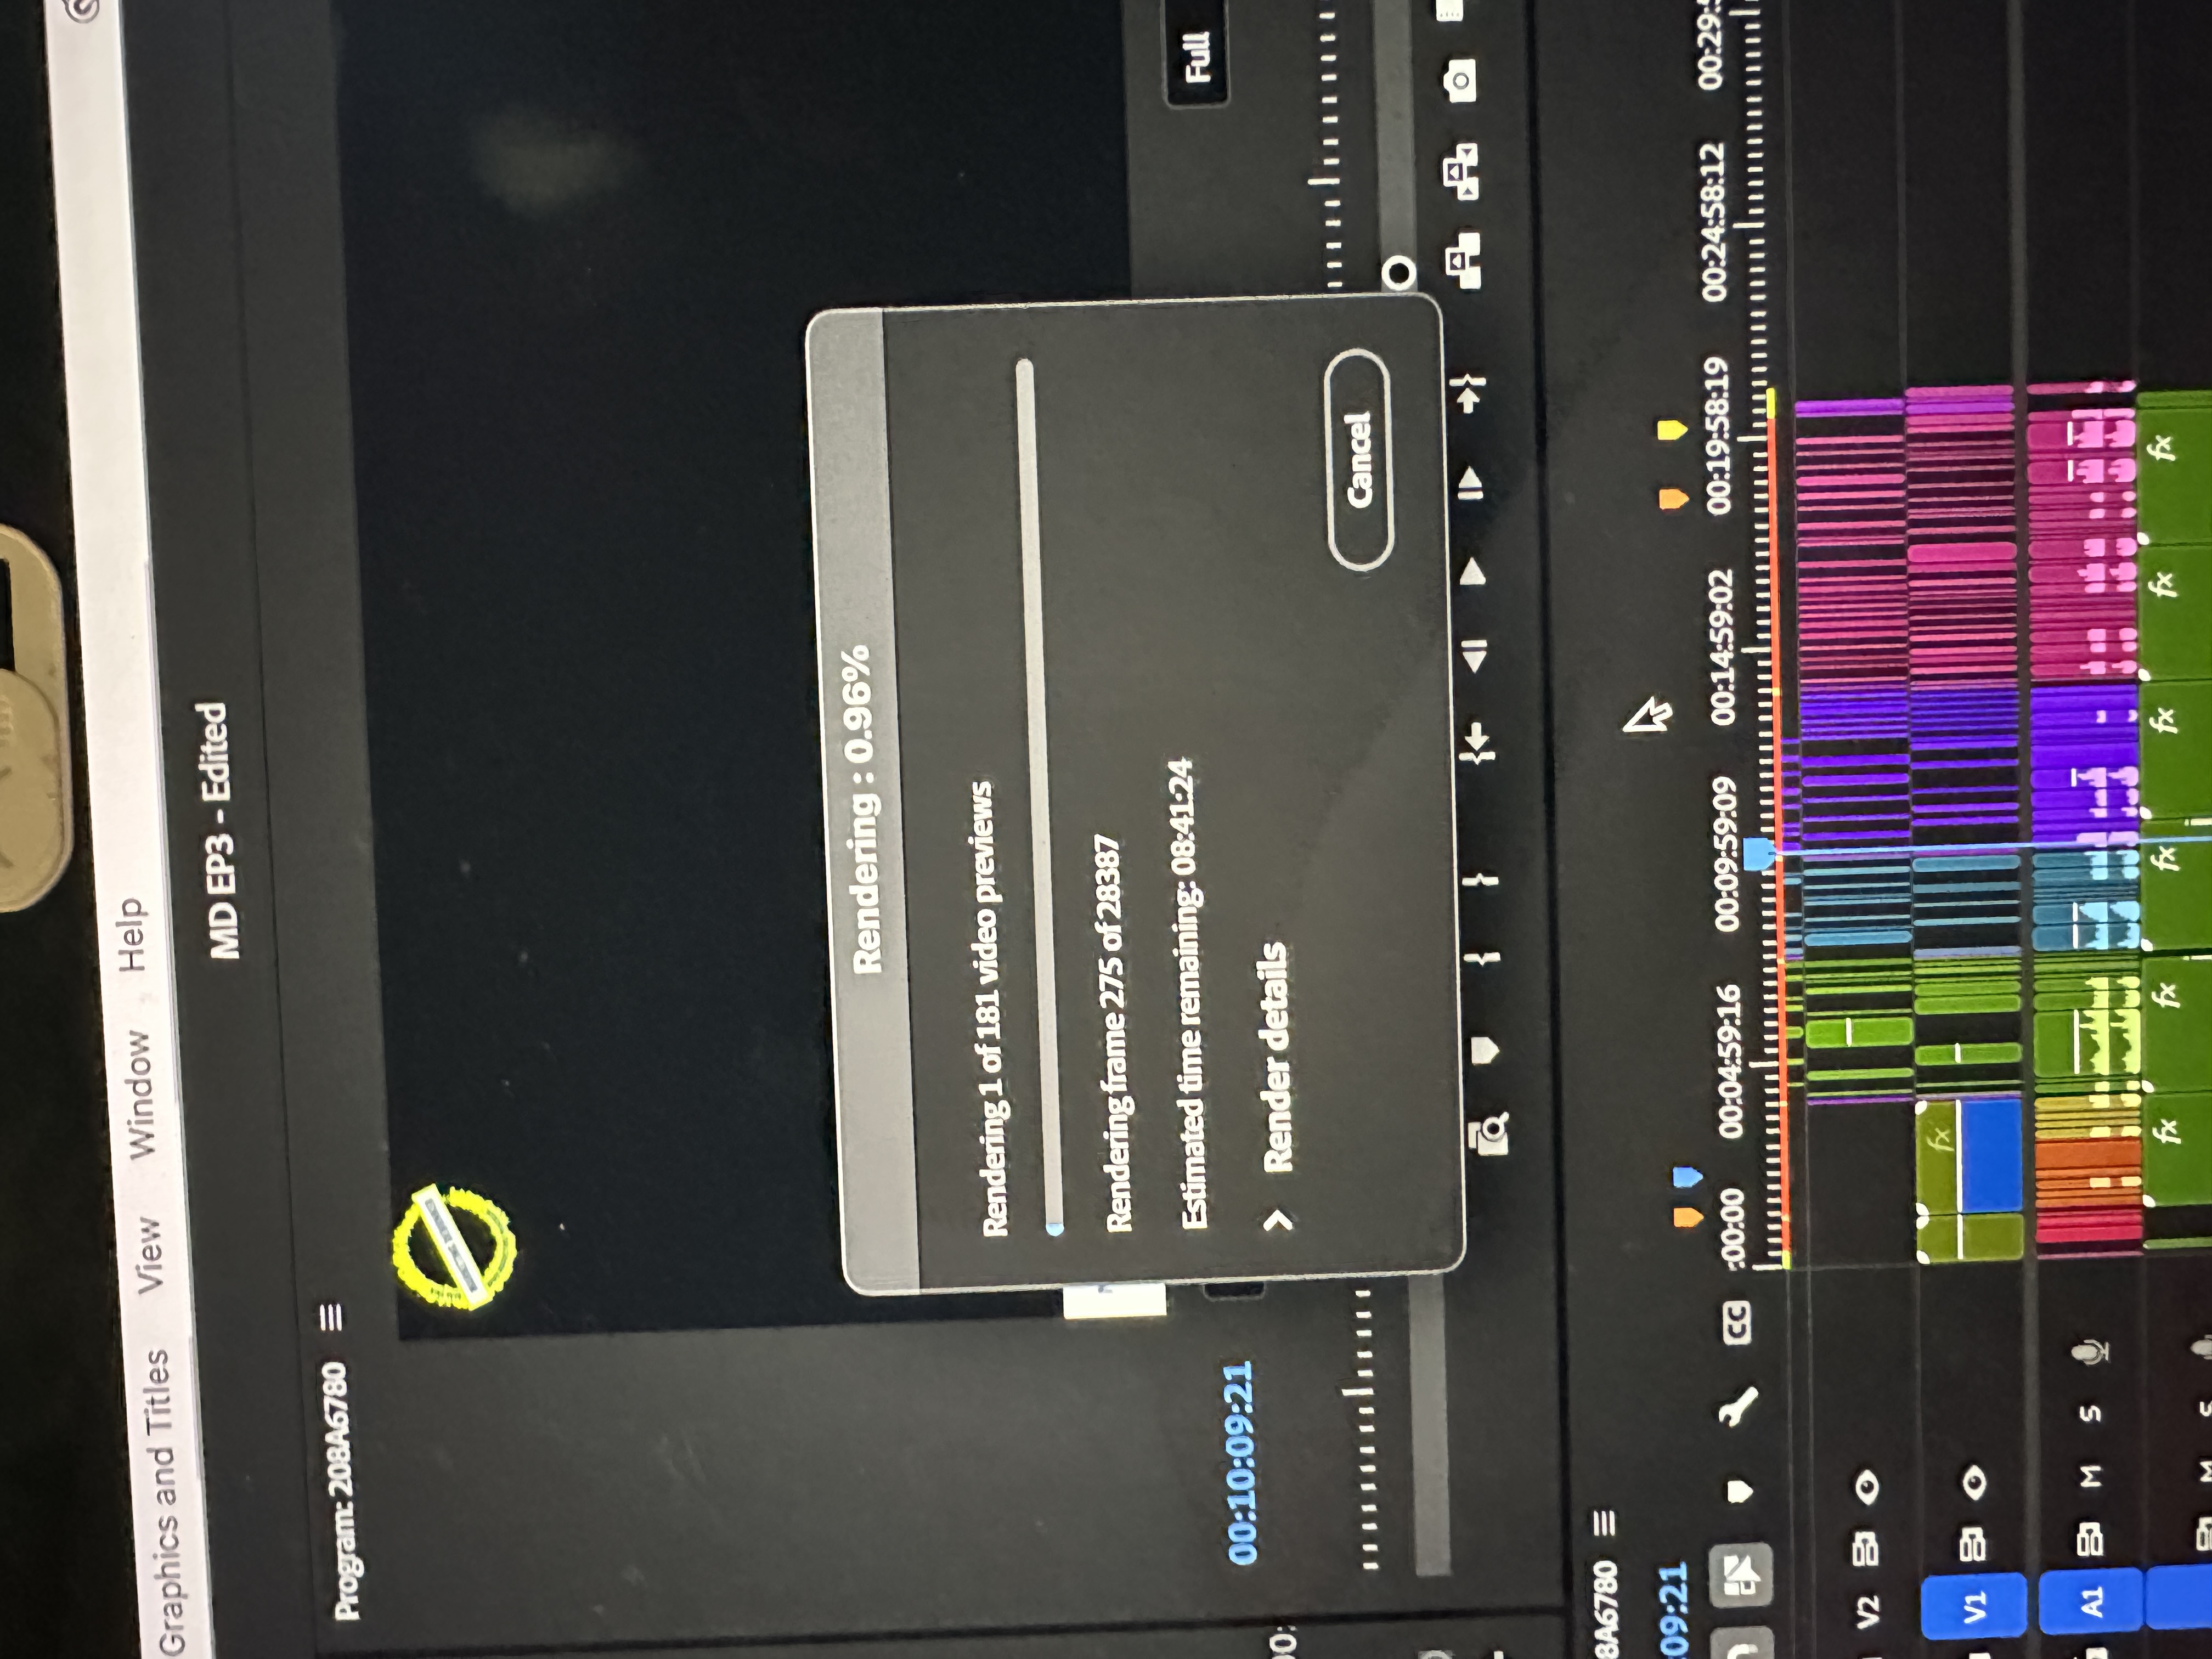
Rendering: The process of generating a final video file from the timeline
Keyframing: Marking specific points on a clip to change properties (position, scale, volume) over time.
Even though I’ve been editing videos for a hot minute, I still make mistakes while editing. A lot. Here are the things I check before exporting a video

Email: csipila13@gmail.com